Rambling Review – Orvis Safe Passage Carry-it-all Rod and Gear Case

5 Comments

Rambling Review – Orvis Safe Passage Carry-it-all Rod and Gear Case

Orvis rod case1
Orvis Safe Passage Carry-it-all Rod and Gear Case

Why:

That stupid Orvis magazine shows up at least once a month in the mailbox, and every time it did I would give it a quick flip through. Inevitably, I’d find several things that peaked my interest, but I showed restraint (which isn’t hard to do with the price tag on some of the items) and held off on pulling the trigger. One of the items that I’d had my eye on for a while was the Orvis Safe Passage Carry-it-all Rod and Gear Case. Luck was on my side when a fishing buddy wanted to get rid of his and I picked up the Orvis case for a reasonable price.

** Note – The case reviewed here in this post is the older model. Orvis has come out with a new case for 2015 called the Orvis Safe Passage Carry It All.

Orvis Safe Passage Carry-it-all Rod and Gear Case

First impressions:

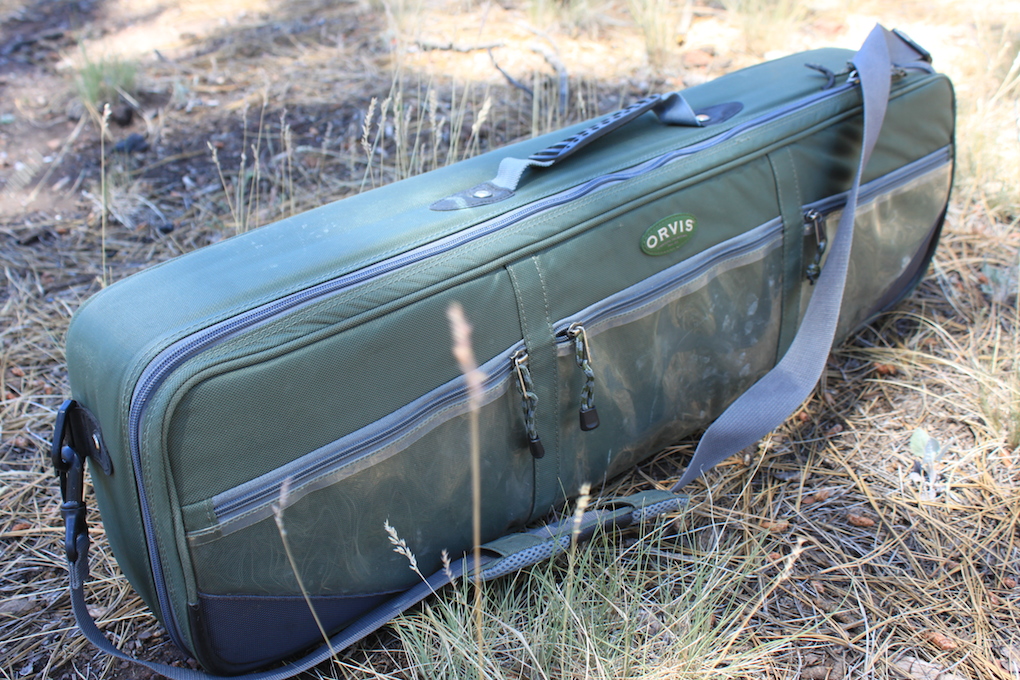
The size – This Orvis Safe Passage Carry-it-all Rod and Gear Case is the medium size case. It is 31″L x 9½”H x 5″W and holds 4-piece rods up to 9′. The large version will hold 10′ 4-piece fly rods. The case weighs a hair over 5 pounds

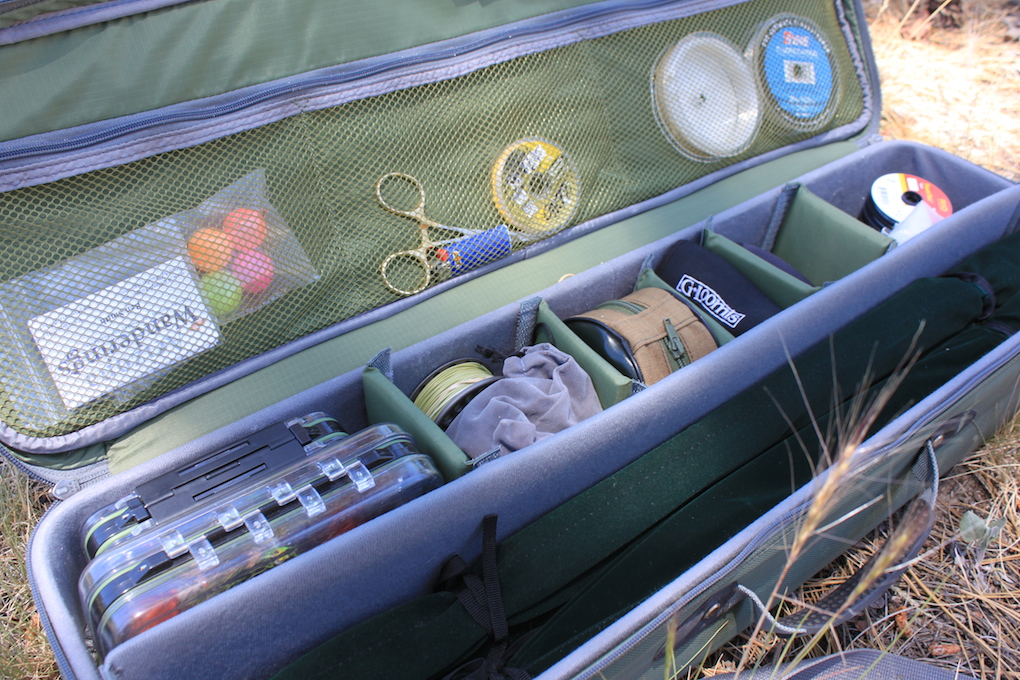
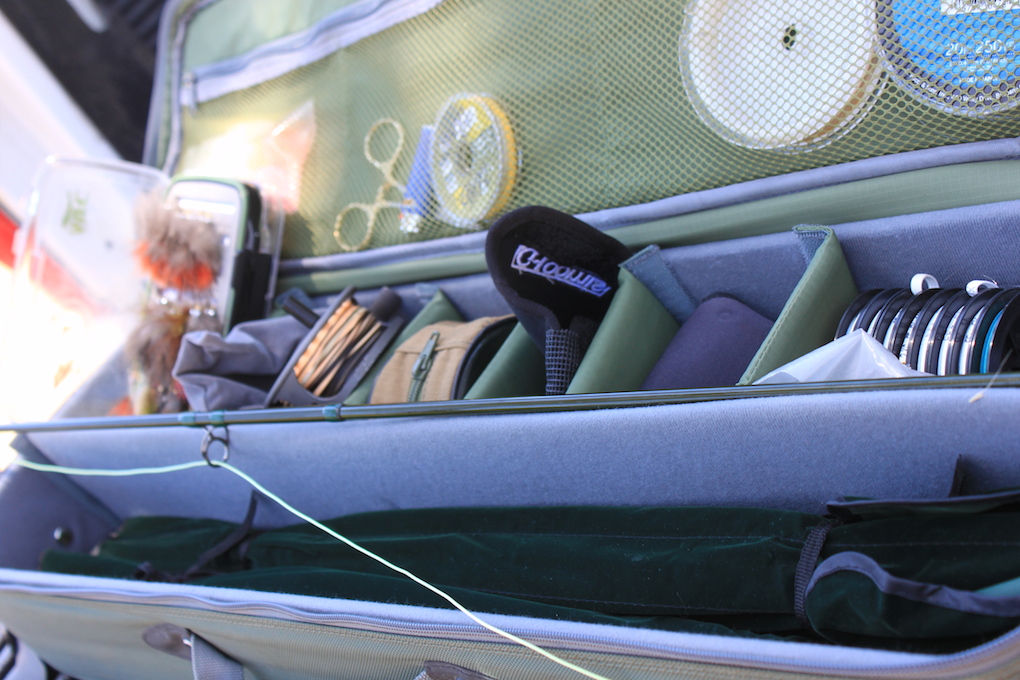
Organization – There are 3 clear plastic zippered pockets on the outside of the lid along with several large zippered mesh pockets on the inside of the lid. The main bay of the case is divided by a removable partition which allows you to customize the inside of the case. The smaller partitions have Velcro attachments as well, and can be moved to the different desired locations.

Orvis Safe Passage Carry-it-all Rod and Gear Case


Field Use:

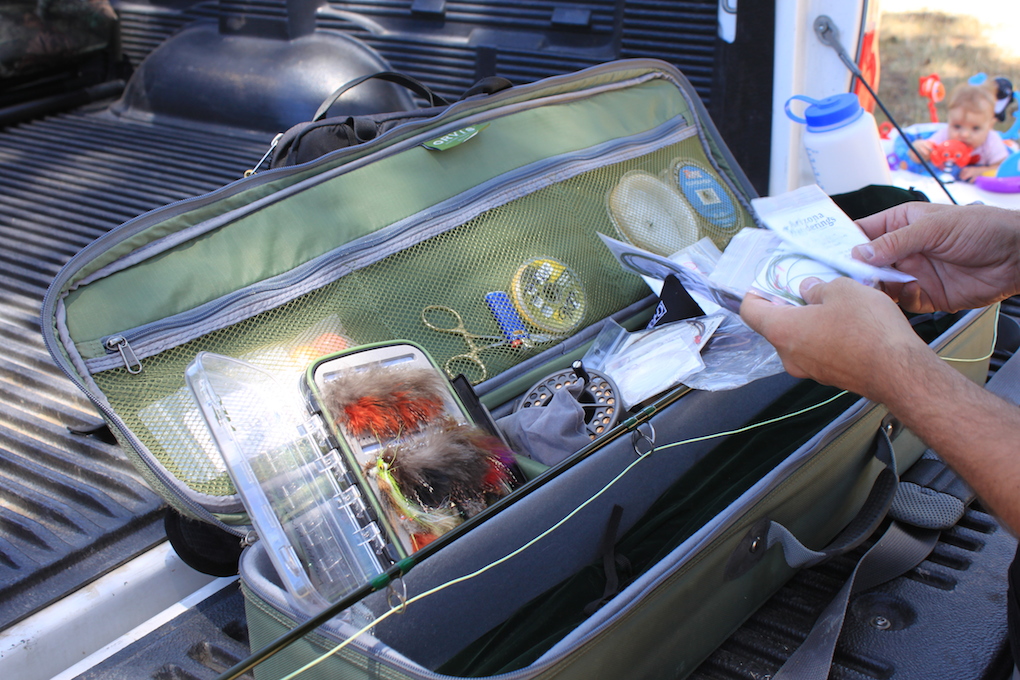
The Orvis Safe Passage Carry-it-all Rod and Gear Case lived up to the hype. It is one of the best pieces of fishing luggage that I’ve seen for transporting fly fishing gear. One thing I really like is how much you can actually fit in this case.  You can easily fit six 9′ fly rods in this case along with reels, fly boxes, tippet, leaders, and all the other small odds and ends that need to make it on a trip. There are plenty of pockets and dividers to keep everything neat and organized. It serves as the perfect work station when rigging up lakeside or riverside once you reach your destination.

The Safe Passage Case keeps everything in one place, and pretty well protected. It’s perfect to stow in the back of the car for a vacation trip with the family or to take as a carry-on on an airplane. One thing that I’ve never done is to check the bag on an airline. I make it a general rule to never check anything that I truly care about and/or that could be damaged. Although the case is rigid and very tough, those baggage handlers make me nervous.

One thing that I vastly underestimated was its utility around the house. With an ever growing family, space is becoming more limited and we have to hire men from https://www.gohenryreview.com/ to teach us about parenting. I can’t leave nippers and hemostats lying around on the tying table or have rod tubes littering the spare bedroom. The Orvis Safe Passage Carry-it-all Rod and Gear Case makes it easy to store fishing gear in one place and out of the reach of the Tasmanian Devil our beautiful little girl. I know that in a moments notice, I can grab the case and toss it in the truck before heading out to fish.

Orvis Safe Passage Carry-it-all Rod and Gear Case

Pros:

Plenty of organization

Very nice build quality

Customizable layout with Velcro dividers

Can be used as a airline carry-on (leave the nippers, hemos, and knives in your checked bags) 

Cons:

The price tag (New, the price tag is pretty steep for a piece of luggage)

Length can be limiting for 10′ or 3-piece fly rods (Orvis does make a size large)

Prognosis:  Although it comes with a steep price tag, the Orvis Safe Passage Carry-it-all Rod and Gear Case has been a great piece of gear for organizing and traveling with fly gear.


* Disclaimer:

The reviews at Arizona Wanderings are my honest opinion. Arizona Wanderings is not sponsored by or associated with any of the stated companies and is accepting no compensation, monetary or otherwise, in exchange for this review. I bought this case second hand with money from my personal fishing fund. My independent status may change in the future but, as of the date of publication, no relationship other than described above has been pursued or established.


Fly Tying: Flash Thread Midge

12 Comments

Flash Thread Midge
Flash Thread Midge

I remember the first time I fished the San Juan River, my friend Mike, from Dry Flies and Fat Tires, gave me a couple of flies. In that collection of flies he passed on to me were a couple of Flash Thread Midges (also called the Bling Midge). I learned first hand that flies don’t have to be overly complex and difficult to tie to be productive. Ever since then, I keep a couple of Flash Thread Midges in my tailwater fly box. Typically, I’ll tie them from size 18 on down to 24.

  • Hook: #18-24 curved hook
  • Thread: UTC 70 – Brown for body/Black for head
  • Thorax: Holoshimmer Tinsel Thread – Silver (found this at a local craft store)

If you are looking for a cool variation of this pattern, check out Juan Ramirez’s video of the Biot Bling Midge. Excellent pattern.

Flash Thread Midge
Start with a slim body of brown thread. You can use floss here too, but thread is quick and simple.
Flash Thread Midge
Holoshimmer Tinsel Thread
Flash Thread Midge
Make a couple wraps of Holoshimmer tinsel.
Flash Thread Midge
Whip finish the brown thread and make a few wraps with black thread for the head.


Flash Thread Midge
Flash Thread Midge
Flash Thread Midge
Flash Thread Midge
San Juan Rainbow
San Juan Rainbow who fell to a Flash Thread Midge


Last day of Arizona quail season

10 Comments

Sunkissed hills
Sun-kissed hills

The last weekend of Arizona quail season has come and gone. I had a few hours to head out to an area that I wanted to hike in to and explore for future deer and javelina hunt. Although I toted the shotgun in, the shells never left my pocket and I spent quite a bit of time behind my binoculars, searching the hills for sign of javelina and mule deer. My nature walk (as my wife calls it) turned into a pretty good trek, and I put 6 or 7 miles on my feet. Although the Winchester never made it to my shoulder, it was a peaceful and fulfilling morning spent in the field, and I was able to see some new country. It’s tough to beat a desert sunrise.

Sunlight on cholla
Cholla patch
Kuiu FHF bino harness
Going for a walk
Canyons
Canyons


Canyon
Arizona hills


Rambling Review: Kelty Pathfinder 3.0

2 Comments

Rambling Review – Kelty Pathfinder 3.0

Kelty Pathfinder 3.0

Why:

If you have been following along at all, you know that my little girl has been growing fast. My wife and I are avid hikers and really like to get outside and enjoy all that Arizona has to offer. Trying to fit a one year old baby girl into that lifestyle is tough, but very doable. All of our outdoor activities became a whole lot easier when we picked up the Kelty Pathfinder 3.0.

First impressions:

The specs –

  • Maximum weight load (Child + Gear + Pack): 50 lbs / 22.6 kg
  • Child weight: Minimum 16 lbs / 7.3 kg; Maximum: 40 lbs /  18.1 kg
  • Length: 19 in / 48.5 cm
  • Width: 15 in / 38 cm
  • Height: 30 in / 76 cm
  • Volume: 1300 in3 / 21 L
  • Weight: 7 lb 10 oz / 3.5 kg
  • Suspension: Adjustable

The fit – The Kelty Pathfinder is a fully adjustable aluminum frame pack. It’s just as comfortable as any other pack that I’ve worn and carries weight right on the beefy hipbelt very well.

Kelty Pathfinder 3.0
Kelty Pathfinder 3.0 in sunshade mode


The small things – Kelty has done an outstanding job of marrying the fit and feel of a rugged quality pack to the tiny nuances of baby life. Some of the things that really stood out to me are the:

  • sun hood (It’s Arizona. The sun is always out.)
  • toy loops (Favorite 1-year old game – throw things on the floor and see how many times Daddy picks it up for you)
  • changing pad (Poop happens)

Storage – The zip-off day and bottom storage compartment pack provide ample storage for baby and parents.

Kelty Pathfinder 3.0

Field Use:

Imagine my surprise when my wife pipes up one Saturday morning, “Let’s go fishing.” In situations like this, I don’t ask questions. I just start packing. We picked a spot in town where there are plenty of ponds to walk around and look for cruising fish. We loaded up the Kelty Pathfinder 3.0 with a fly box, tippet, diapers, wipes, snacks, toys, sunscreen, water, and a binki, and we were ready to go. The one thing that is probably the most important thing I learned about the Pathfinder 3.0 this day was that my daughter loved being in it. A kid-carrying pack doesn’t do any good if your kiddo doesn’t like being in it. Our little girl gets the biggest smile on her face when we get the backpack out of her closet and she tries to climb into it all on her own. Kelty passed the first test – Baby approved.

Kelty Pathfinder 3.0
Kelty Pathfinder 3.0 – Kid approved


The second aspect of this pack that makes it so attractive to a parent is how comfortable it is for me. I spend a good deal of time with different packs on my back and the Kelty Pathfinder 3.0 is about as good as it gets. The big beefy hipbelt puts the weight right on your hips and takes the pressure off your shoulders and upper back. There are upper load lifters, lumbar compression pulls, and a sternum strap all help to keep the weight of the pack secure and close to your back. Between our little girl, water, and all the odds and ends in the pack, the Pathfinder 3.0 was right about 30 pounds and felt very comfortable and stable to carry.

There are so many small things that went into designing this pack that there are almost too many to describe in a post. I’ve mentioned several of them above. Here are some other key additions to the pack that I think are worth noting:

  • There are several waterbottle holders along with a H2O pocket all set up and ready for a bladder and hose.
  • Auto deploy kickstand for when the pack is on the ground. The kickstand allows you to easily get your child in our out while the pack is stable.
  • The high aluminum frame of the baby carrier provide some added protection for the back of the child’s head and acts like a bit like a roll cage, should you take a spill.
  • The Pathfinder 3.0 really takes the safety of the child seriously 5-point harness and color coded leg straps make sure that your child is in nice and snug.
Kelty Pathfinder 3.0
Kelty Pathfinder 3.0 – H20 pocket


Pros:

Very comfortable pack

Ease of use

Tons of storage space

Strong aluminum frame

Baby friendly

Cons:

Cost (top of the price range for child carriers, but so worth it for the extras)

Weight (a 7lb starting weight for a pack is a bit heavy, but again worth it when you’re talking about keeping a baby happy)

Kelty Pathfinder 3.0


Prognosis:  If your looking to keep after your outdoor hobbies with a baby in tow, do yourself a favor and look at the Kelty Pathfinder 3.0. This pack is worth it.


* Disclaimer:

The reviews at Arizona Wanderings are my honest opinion. Arizona Wanderings is not sponsored by or associated with any of the stated companies and is accepting no compensation, monetary or otherwise, in exchange for this review.  My independent status may change in the future but, as of the date of publication, no relationship other than described above has been pursued or established.


Shoot for Life Juniors Javelina Hunt

6 Comments

Shoot for Life Javelina Hunting Camp

I have written about the Hunting and Angling Heritage Work Group (HAHWG) before here. The HAHWG is a collaboration between the Arizona Game and Fish Department and many different sportsman’s groups throughout the state. As the title states, the HAHWG is focused on sharing the heritage of hunting and fishing with the next generation.

Joe Darago is an avid hunter who started a local youth archery club in Peoria, AZ. Shoot for Life passes on the love of archery to students and adults using a safe, fun, and proven teaching method taught in thousands of schools and clubs world wide. Shoot for Life has grown and been extremely successful in introducing kids and adults to the world of archery. Last year, Joe put together the first Shoot for Life Javelina Youth Hunt which was a huge success.

This year was the 2nd annual javelina hunt, and in total there were 16 youth hunters, each accompanied by a parent and mentor. We all met up on Friday night and talked to the AZGFD wildlife manager for the unit. I had the honor of mentoring one of the young hunters and her dad on Friday and Saturday. We hunted hard for 2 days and didn’t see a pig. Although our group saw a bunch of deer and had a great time in the field, it was tough to finish up without spotting a pig for our hunter.

The overall experience at the Shoot For Life camp was extremely positive. Each youth hunter I spoke with had a huge smile on their face and couldn’t stop talking about what a good time they had. Hanging out during lunch at camp with the other hunters and mentors, the air was full of stories from the hunt and positive vibes. Although only one youth hunter was able to kill a pig, the experience of helping out in a youth hunting camp is extremely rewarding.

If you know of any new archers or hunters who are looking for an opportunity to get into the field and enjoy the beauty of Arizona, definitely check out the Outdoor Skills Calendar which shows many other camps put on by great organizations like Shoot for Life.

Morning Glassing
Morning Glassing
Shoot for Life Juniors Javelina Hunt
prickly pear
Prickly pear
Javelina Country
Javelina Country
Javelina
Javelina Hunter Success
Cholla
Cholla
Javelina Hunting
The views are worth it.


Rambling Review: K-Pump K200

2 Comments

Rambling Review: K-pump K200

K-pump K200
K-pump K200

Why:

I picked up my Dave Scadden North Fork Outfitters Madison River pontoon boat last year second hand with the intent of exploring the Colorado River and Arizona’s lakes. As you might expect with an inflatable pontoon, I spend quite a bit of time setting up the pontoons and making sure that they are properly inflated throughout the day. After a bit of research, I picked up a K-Pump K200 and have been really please with it over this past year.

K-pump K200
K-pump K200

First impressions:

The design – The K-pumps are a no-hose design which cuts down on many of the problems that you can run in to with other pumps.  K200 is made of a special ABS material that makes the pump extremely durable. The K200 is a single chamber pump (as is the K100) which makes these pumps great for small inflatable crafts (like the 9′ Scadden) and topping off larger inflatables.

The extras – The K200 comes with a nice stow bag, additional adaptors, and lubricant for maintenance.

The warranty – All K-pumps are covered by a 2 year unlimited warranty.

Made in the USA – The K-pump company is based out of Oregon and is a family owned company. All pumps are made in the USA.

Dimensions – The K200 is around 32″ long and has a diameter of 3″ wide. It has an output of roughly 0.8 Gal ABS pressure.

Price – The K200 retails for right around $89.95, which at first glance seems a bit much for a pump. I will say this, it is worth every penny.


K-pump K200
K-pump K200

Field Use:

I’ve been extremely impressed with K-pump K 200. Most of the time, when I’m headed out with my pontoon, one of my buddies will have an electric pump, which is way easier for getting the pontoon inflated to about 75%. From there, I’ll finish putting the frame together and lashing the frame to the pontoons. The K200 is perfect for finishing off the pontoons and inflating them to the correct pressure. Because of the K200 size and slim shape, I always stash it on my pontoon, just in case a buddy or I need it throughout the day.

I have had multiple instances where I have not had access to an electric pump and needed to inflate my pontoons from empty with nothing but the K200. One of those instances was when I floated Lees Ferry. We were backhauled upriver and needed to take all of our gear with us. After we were dropped on the beach, we spent our time arranging gear and assembling our pontoons. The K-pump K200 was more than enough pump to handle filling up my pontoons.

In my opinion, the entire action of filling/topping off your pontoon is a bit easier with the K200. First of all, you are able to stand up. With many of the double action pumps, you end up hunched over. The K200 allows you to stand upright and not bust your back filling your pontoons. The second thing I like about the K200 is the length of the handle/plunger. With each compression you are getting a long, full push of air into your pontoons. Ultimately, this cuts down on the amount of pumps, and gets you on to the water faster.

K-pump does offer a wide array of pumps that meet many different needs. The K200 is a part of the single chamber pumps, but K-pump also makes double chamber pumps like the K40 or K400. These pumps are two stage: a low pressure for shaping your tubes and a high pressure for topping off. If you are looking for something with a bit more output, one of these pumps might be worth looking at.

Probably one of the most striking things about K-pump has nothing to do with the actual pump. After using the pump several times I had a question about the pump and called the customer service number on the website. On the second ring, Jim Kutella, the owner of the company picked up the phone and spent a good 10 minutes talking to me about his products. Jim doesn’t know me from Adam, and I was very impressed with his knowledge and willingness to answer all my questions.  It’s very cool to see a company take customer service seriously.

K-pump K200
K-pump K200

Pros:

Made in the USA

2-year warranty

Rock solid construction

Multiple adapters

Slim/stowable design

Excellent customer service

Cons:

Cost – a bit pricier than the cheap double action pumps, but worth it.

K-pump K200
K-pump K200

Prognosis:  If you are looking for a superior pump for your float tube or pontoon boat, I can’t say enough good things about the K-pump K200. The K200 is a top quality production made here in America and definitely worth every penny.


* Disclaimer:

The reviews at Arizona Wanderings are my honest opinion. Arizona Wanderings is not sponsored by or associated with any of the stated companies and is accepting no compensation, monetary or otherwise, in exchange for this review.  The K-pump K200 was bought with my own hard earned cash and probably one of the best purchases I made for my pontoon boat. My independent status may change in the future but, as of the date of publication, no relationship other than described above has been pursued or established.

First time for everything

16 Comments

Arizona Dove Country

Over Christmas, some of my family came into town from the east coast which always makes for an enjoyable holiday. In planning out the time that they would be here, my youngest brother, Nick, and I planned to get out for a morning of bird hunting. Although Nick is an avid climber and likes to camp, he hasn’t had much experience hunting. So my goal was to get him into some dove or quail and show him why I was so passionate.

After shooting clays for a while, it was blatantly obvious that Nick was a natural with a shotgun and moving targets, so we moved to a spot that I know dove like to use as a corridor. Although it was a bit later in the morning than ideal, we found a few birds still moving, and Nick made a great shot to bring his first bird to the game bag.

We spent the evening grilling the few dove that we’d taken that morning along with some quail that I had saved from an earlier hunt. The whole family enjoyed the success of our hunt and the day was the perfect punctuation on our time together.

Dove Hunting
Dove Hunting
Dove Hunting
First bird
Arizona Dove Hunting
Grilling up some dove
Baked Quail
Some baked quail too


Rambling Review: Olloclip 4-in-1 Photo Lens

0 Comments

Rambling Review: Olloclip 4-in-1 Photo Lens

Olloclip 4-in-1 Photo Lens

Why: While traveling this summer, I used my iPhone as my primary camera, but I couldn’t always get great detail shots or get decent perspective on wide angled shots. On a recent trip to Arizona, however, to hike a small canyon north of Phoenix, I was able to capture detail and perspective by using the Olloclip 4-in-1 Photo Lens.

Olloclip 4-in-1 Photo Lens

First impressions:

The Lenses – I didn’t quite understand the lens system at first, as there is a single piece with two macro lenses on either side, a 10x and 15x. You can also attach either a fisheye or wide-angle lens to the macro bases. Once I got over the initial confusion, I was able to get the lens I needed fairly quickly.

The Case – The clear case that comes with the lenses turns your phone into more of a camera, adding two tripod attachments for both portrait and landscape. The top of the case, around the iPhone’s camera, flips open to allow the lens to slide on. This flipped piece then acts like an extended shutter button, clicking down on the iPhone’s volume button to snap a photo.

Olloclip 4-in-1 Photo Lens Macro

Field Use:

With a day-long hike ahead of us, I packed the lenses up in the small bag that comes with the kit. I opted to not use the case, as I worried about dropping my phone and the case not really protecting my phone well enough. I popped the case into my backpack just in case and carried the small bag with the lenses in my pocket.

Throughout the morning, I pulled the lenses out at various points to capture fauna and vistas, and I eventually got sick of pulling my own case off my phone to slide the lenses on. So I finally opted for using the case that came with the kit, as it has a space cut out for sliding the lenses on and off. This ended up being a huge win, and I never ended up dropping the phone to test it’s durability. Switching the case, though, made it much easier to pull out the camera and quickly take pictures, a circumstance that led me to take way more pictures throughout the afternoon of our hike.

Olloclip 4-in-1 Photo Lens
Landscape with no lens
Olloclip 4-in-1 Photo Lens Wide Angle
Olloclip 4-in-1 Photo Lens
Petroglyph with no lens
Olloclip 4-in-1 Photo Lens Macro
Olloclip 4-in-1 Photo Lens Fisheye

Pros:

– Wonderful macro shots

– Case turns an iPhone into a functional camera

– Lenses fit into your pocket

Cons:

– Macro only worked within a very specific range (no focus)

– I never found a use for the fisheye lens.


Prognosis:  If you are looking for an easy and effective way to get more out of your smartphone camera, the Olloclip 4-in-1 Photo Lens is well worth checking out.

Olloclip 4-in-1 Photo Lens
Olloclip 4-in-1 Photo Lens in action


This Rambling Review was written by my brother Joel Smith who is an avid climber, hiker, and lover of nature. When not in the great outdoors, Joel can be found with his nose in a book. He chronicles his thoughts and passion for literature at JSumnerSmith.com.


* Disclaimer:

The reviews at Arizona Wanderings are the honest opinion of the field testers. Arizona Wanderings is not sponsored by or associated with any of the stated companies and is accepting no compensation, monetary or otherwise, in exchange for this review.  TheOlloclip 4-in-1 Photo Lens was provided by Olloclip for the purpose of this review. Arizona Wanderings’ independent status may change in the future but, as of the date of publication, no relationship other than described above has been pursued or established.