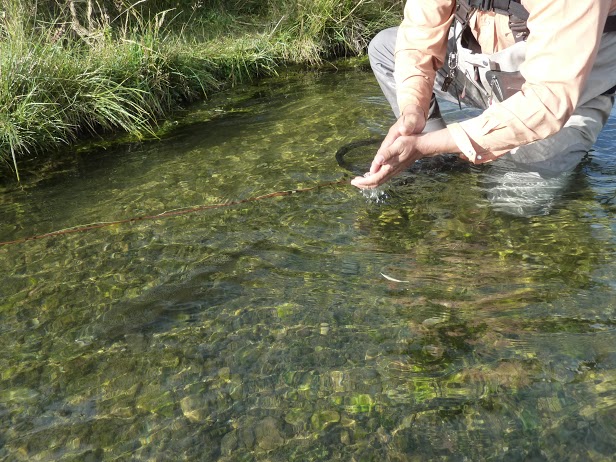
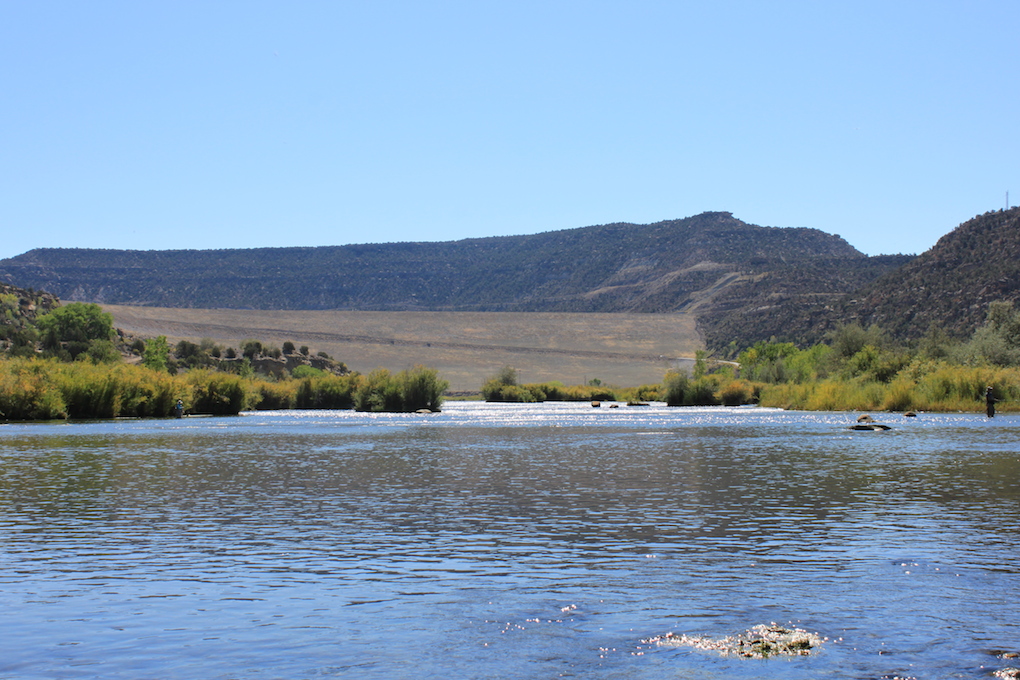
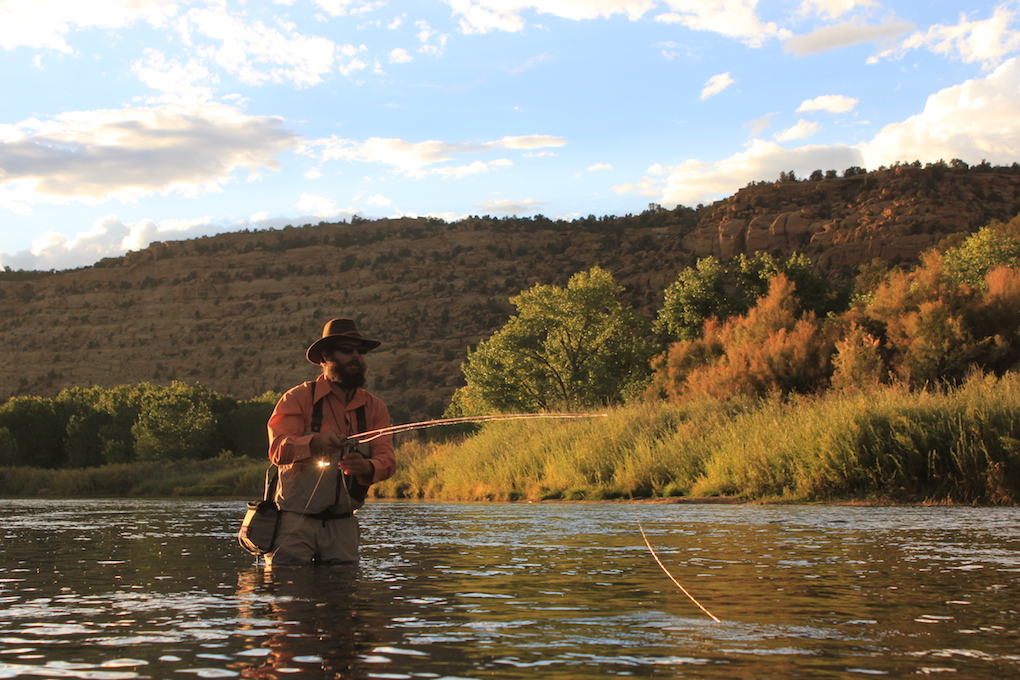
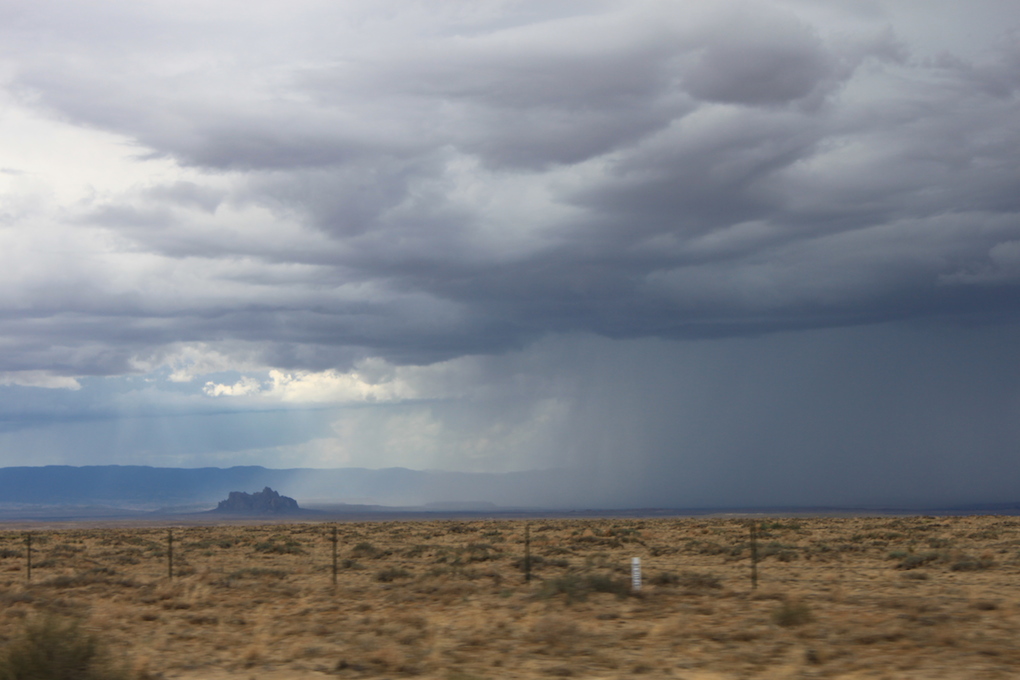
My wife and daughter were out of town visiting a friend and I had an epic backpacking trip planned for the White Mountains, but wouldn’t you know it, we received some serious rain and all the creeks were running brown. Not being one to miss an opportunity to fish, I headed to the New Mexico with a couple of buddies to see how the San Juan River was fishing. We had a fantastic couple days on the water catching heavy rainbows, swatting mosquitos, and hanging with some pretty awesome guys.
A couple of things to note from the trip if you’re interested in heading that way soon.
1. Fish came on all the usual stuff: small midges, red annelids, San Juan worms, and tiny dries.
2. Sportsman’s Bar and Grill has opened back up under new ownership and their green chili burger was pretty top notch.
3. Bug Spray.
4. We always stop in a Float ‘N Fish when we are out at the San Juan, and this time we scored some great tying material from the bargain bin. If you are needing anything when you’re at the Juan, stop here.
5. Honorable mention: I’d never had breakfast at Abe’s, but their omelet with everything in it is legit.
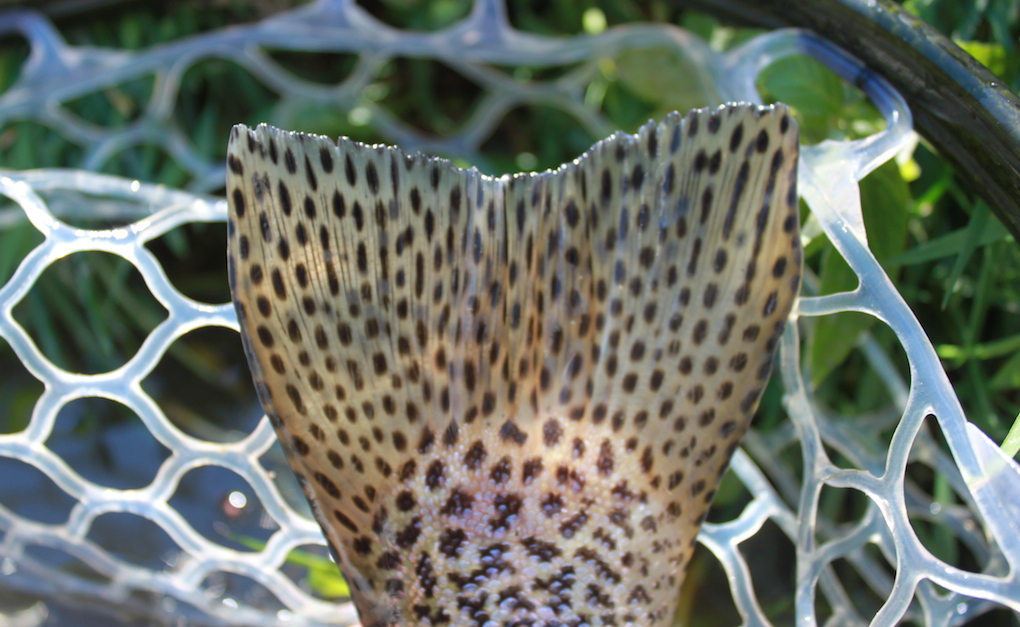
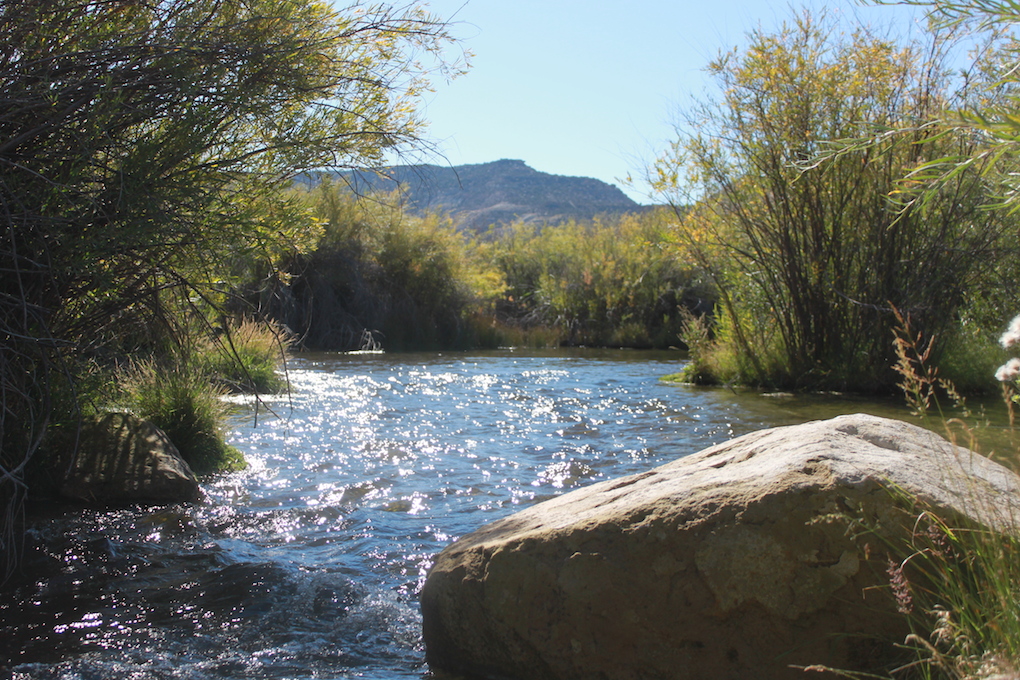
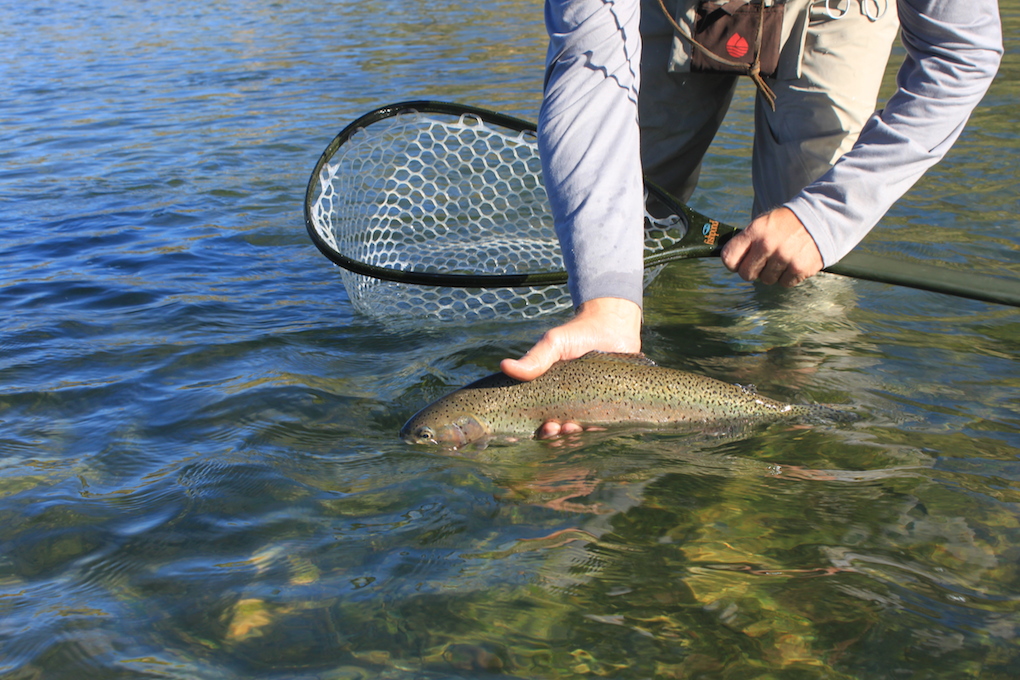
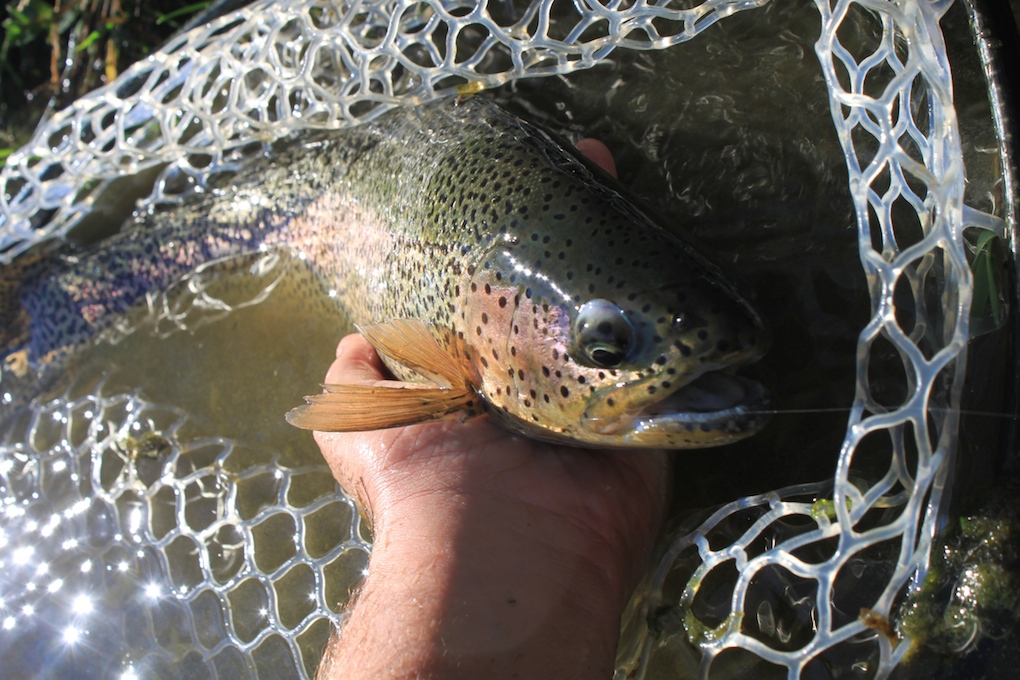
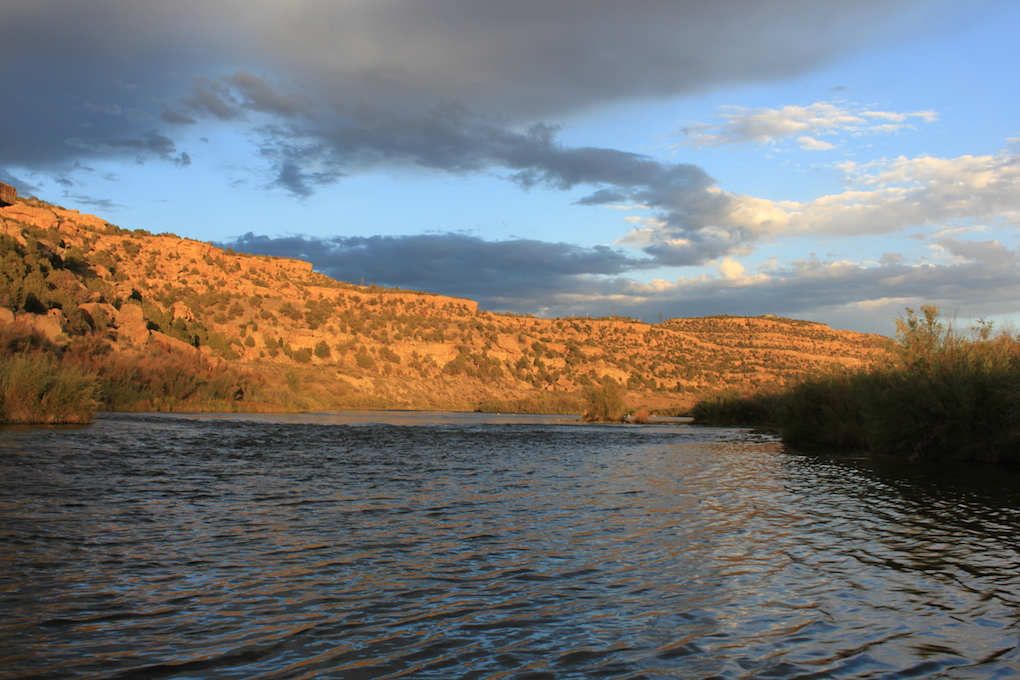
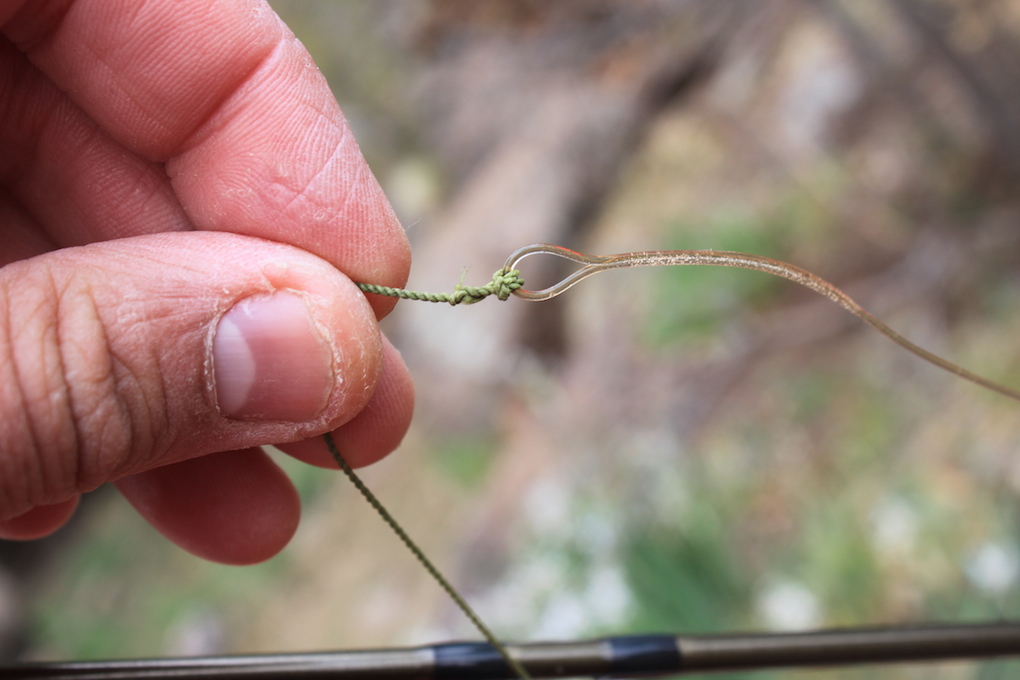
San Juan River BraidsKC Badger and a nice San Juan RainbowSan Juan River RainbowDJ releasing a healthy rainbow (photo credit: Jason Jones)KC tying on some meatNavajo DamThe San Juan at SunsetDJ working some rising rainbowsDesert Rain (photo credit: DJ Zor)
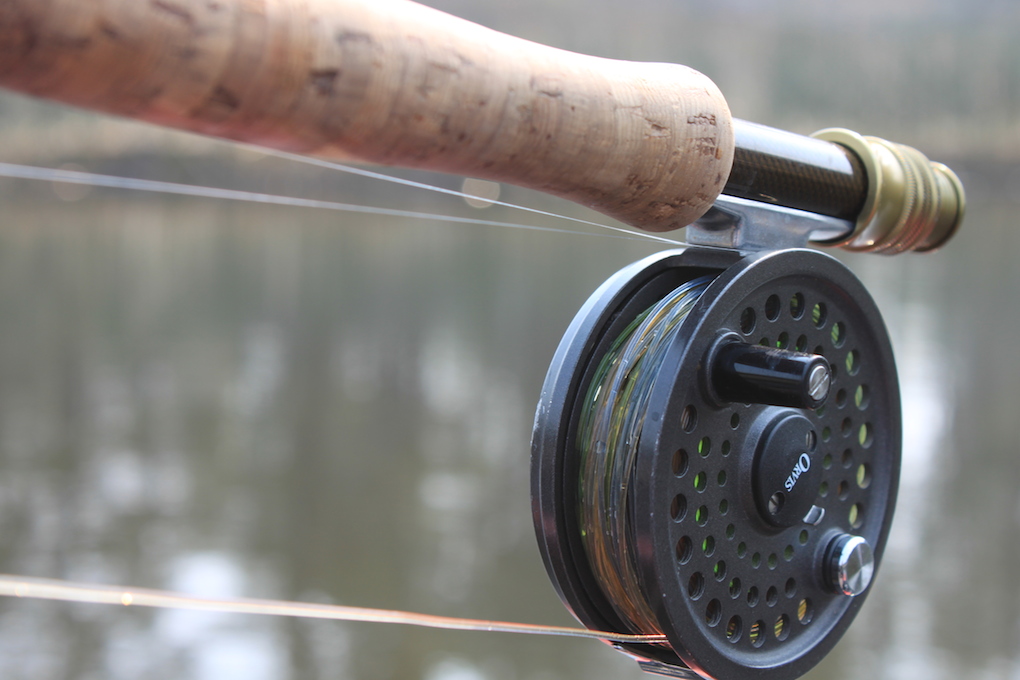
Rambling Review – Cortland 444 Intermediate Clear Camo Fly Line
Cortland 444 Intermediate Clear Camo Fly Line getting ready to get lined
Why: With the recent purchase of the pontoon boat and the subsequent exploration of Arizona’s stillwaters, I found myself in need of picking up some intermediate fly line, in order to work the high country lakes in search of some trout. After a little bit of looking, I was able to get my hands on some of the Cortland 444 Intermediate Clear Camo Fly Line.
Cortland 444 Intermediate Clear Camo Fly Line
First impressions:
The facts: The Cortland 444 Intermediate Clear Camo Fly Line is a weight forward line with a 30′ head, complete with a welded loop on the head of the fly line for quick changing leaders. The core of the line is solid monofilament, which is then covered with a supple, crystal clear intermediate coating.
Sink Rate: The Cortland’s Clear Camo Fly Line is designed as the name implies to be an “intermediate” sinking line. The line is built to sink at a rate of 1.25″ to 1.75″.
The color: Having mainly fished floating line, the coloring of the clear camo fly line is pretty striking. The fly line is actually clear but is dyed in Cortland, New York to give it the “camo” coloring. In the water, the camo line virtually disappears as it sink to the desired depth.
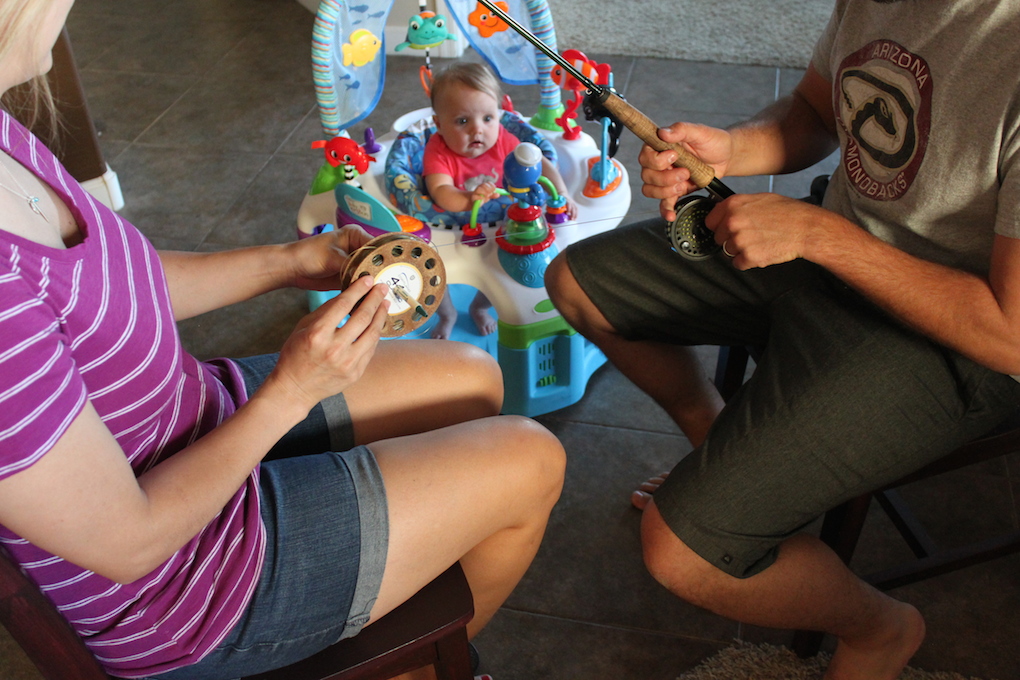
Cortland 444 Intermediate Clear Camo Fly Line
It always helps to have a buddy or two around to help spool line
Field Use:
This is the first summer with my new pontoon boat and I’ve been spending a good amount of time exploring the lakes here in Arizona. Most days when I get to the lake, I’ll rig up two rods. I always rig one with floating line for dry flies and one with the Cortland 444 Intermediate Clear Camo Fly Line. I’ve taken to using a short Uni-thread furled leader without any floatant. The leader tends to absorb water and sinks fairly evenly with the intermediate line.
The Cortland 444 Intermediate Clear Camo Fly Line really excels in the 1′ to 10′ range in the water column. The beauty of the intermediate line is being able to know and control where my flies are in the water column. By simply counting down as the line sinks, I can determine how deep my flies are fishing. From this point, it’s pretty simple to start at one depth and work your way deeper or shallower until you start running into fish.
I have been fishing the Cortland Clear Camo line since early spring and it truly is becoming one of my favorite fly lines. Once thing in particular that I like about using an intermediate line for stripping small streamers and leeches on a lake is that there is never a big belly or hinge in the line like you would get with a floating line. An intermediate line allows you to be in constant contact with your flies as the line sinks at a consistent rate, which I feel has helped my success rate on the water. This Cortland Intermediate line is really ideal on windy days too. Since the whole line sinks, the choppy water does not push the line around on the surface of the water, like it would with a floating line.
Cortland 444 Intermediate Clear Camo Fly Line
In recent years, I’ve become a bit religious about cleaning fly lines. Fly line is expensive and I want to make sure it lasts as long as possible. After most trips, I like to clean soak my line in mild soapy warm water and pull it through a clean cloth. I’ve heard of guys who fish Cortland intermediate line pretty hard and have had the same line for years. So far I’ve been impressed with how the line has performed, and I intend on getting years of quality use out of it.
Some things to keep in mind with all intermediate lines is that once your rod is strung up with intermediate line, it’s a bit tough to just switch over to dry fly fishing. It is a pretty good idea to bring along another rod rigged with floating line in case fish start rising. Another thing that is a fairly common complaint about intermediate line is that they retain a ton of memory. I was surprised and pleased by the minimal memory coils in my Cortland 444 Intermediate Clear Camo Fly Line.
I paired the Cortland 444 Intermediate Clear Camo Fly Line with a couple different rods and found that my TFO BVK 5 weight was the winner. The BVK has a fairly fast action and the Cortland Clear Camo loaded it quite nicely. With the little bit of extra weight in the intermediate line, I felt the line cast comfortably in the 30-50 foot range, but was perfectly adept at pushing the line farther if need be. Bottom line, it’s a fun line to cast.
Cortland 444 Intermediate Clear Camo Fly Line combined with a hand spun furled leader
Pros:
Excellent for still water fishing
Camo coloring
Cost (as far as intermediate lines go, the Cortland 444 is pretty reasonable)
Durability (so far has been great)
Smooth through the cast
Made in the USA
Cons:
The Cortland Clear Camo does have a bit of memory like all intermdiate lines do, but nothing that a bit of stretching didn’t fix.
Prognosis: I love this line for stillwater fishing. If you see me on a mountain lake here in AZ, you can bet I’ll have one rod rigged up with Cortland 444 Intermediate Clear Camo Fly Line.
* Disclaimer:The reviews at Arizona Wanderings are my honest opinion. Arizona Wanderings is not sponsored by or associated with any of the stated companies and is accepting no compensation, monetary or otherwise, in exchange for this review. The Cortland 444 Intermediate Clear Camo Fly Line was provided by Cortland for the purpose of this review. My independent status may change in the future but, as of the date of publication, no relationship other than described above has been pursued or established.
Early in 2013, I started to ask questions, research, and prepare for a fly fishing trip to Pyramid Lake. I am by all accounts a small stream fisherman and have limited experience fishing lakes. Having said that, a shot at a 10 or 15 pound fish had me willing to try out Pyramid. I had a 1000 questions though – What fly rod to take? What flies to tie? What’s the ladder for? As I started researching these questions, many of them could be found on various forums, but nothing concise enough for me to read through and have a whole understanding of everything that goes into fly fishing Pyramid Lake. So here are my novice thoughts on preparing for Pyramid Lake.
Fly Fishing Pyramid Lake
Where to stay at Pyramid Lake:
There are a couple of different options for lodging while fishing Pyramid Lake. We were lucky enough to get a trailer at Crosby’s Lodge which is right on the lake and a 5 minute drive to start fishing. We were concerned because Crosby’s filled up quickly and we were on a waiting list. You can camp there on most of the lake beaches, but wind and low temperatures in the spring become huge issues. You must have a permit which is available at one of the stores there, or they are also available online. Also I have heard several stories of people’s camping gear getting stolen or destroyed by others, but I guess you run that risk everywhere. The other half-way decent option for lodging is Reno, where you can get a hotel room for relatively cheap. The only downside is that it’s a 45 minute drive from Reno to Pyramid Lake. My favorite place to stay at are the Portrush Hotels.
Crosby’s Lodge
Fly Rods, Reels, and Line for Pyramid Lake:
Rods – Most everyone that I talked to recommended a 6-8 weight rod for fly fishing Pyramid Lake. It was explained to me that the heavier weight rod is not necessarily for the big fish (although that does help), but it’s more for punching through the heavy winds that plague the fly fishermen there. Many bring their 5 weights and do just fine, but the heavier weight fly rods are considered the better tool for the job.
Pyramid Lake Fly Rods
For me I took my 9′ 6wt TFO BVK and a 9′ 8wt Scierra. I paired my 6 weight with a Lamson Konic reel spooled with a floating line, which I planned to use with my indicator rig. On the indicator, I used one of my flourocarbon furled leaders and tied 12 pound flourocarbon to the tippet ring. The way the bottom of the lake is made up, many of the fish cruise right along the shelf looking for food. Hanging big, bright nymphs under an indicator can be very productive, especially when the wind picks up and the waves start rolling in. When the waves roll, the nymphs bob up and down and often trigger strikes from big fish.
I made an investment for my 8 weight and picked up a Galvin Rush reel with an extra spool. I lined it with a Cortland Precision 30′ “QD”Quick Decent fly linewith a 200gr shooting head. This line is nice because the heavy shooting head and intermediate running line sinks together as opposed to having a huge hinge in the center. While I was there at Pyramid Lake, we originally tried drifting indicators and nymphs, but quickly found that stripping wooly buggers and beetles back along the bottom to be more productive
1. Ladder – The main reason for using a ladder at Pyramid Lake is to get up and out of the water. I think it originally started with milk crates and graduated to ladders. Float tubes are an option, but the wind blows you around pretty good. Nowadays, fisherman will wade out about chest deep in the water and set up their ladder so that they are right along the big drop off. This allows them to stand several rungs up, get mostly out of the water, and be able to make a cast. In some cases, you can actually see cruising fish as they move along the ledge looking for food.
Kyle’s Pyramid Ladder (I was jealous)
Here are my thoughts on ladders: The economical choice is to fish what you have. My buddy let me borrow is three step ladder which I used the first day. It sucked, because I was calf deep in extremely cold water and I chilled very quickly. I switched to my 6 foot A-frame ladder and was then able to climb higher on my ladder and be out of the water, but the A-Frame’s steps are very thin and after 10 hours standing on a ladder, I was fatigued and experiencing serious ladder envy. My buddy, Kyle, who runs the website Sleep When You’re Dead, had done a bit more research and rigged up a very comfortable ladder with a couple of easy modifications for Pyramid Lake. I came home and invested in a similar setup for my future trips to Pyramid, and the ladder will work as an all purpose ladder around the house.
I added a couple of velcro cup holders for water and a coffee cup, as well as some padding for shins and knees. Leaning into a ladder for three days does a number on your knees and legs. Do not underestimate the value of a comfortable ladder.
2. Stripping Basket – Standing on a ladder while stripping line back to yourself can make a mess real quick. Having a stripping basket to strip line into, can clear up a lot of the hassle. Never having used a stripping basket before, I was able to get my hands on a Linkurv stripping basket. I greatly underestimated the need for a stripping basket and was extremely glad that I had it with me on the trip.
Linekurv Stripping Basket
3. Waders and Layers – The worse the weather and wind at Pyramid Lake, the better the fishing. Having said that, standing on a ladder all day in the howling wind can get old real quick. The water itself is extremely cold and fly fishermen should be prepared with proper layering. I layered up with a merino wool base layer, fleece wading pants, and breathable chest waders. On my top, I wore a merino wool base layer, my lucky Filson shirt, REI Primaloft jacket, and my Cabelas softshell. I stayed pretty toasty all day.
Tactics for Pyramid Lake:
There are two distinct ways to fly fish Pyramid Lake: Indicator fishing and stripping flies. Both can be very effective and it is the main reason why many Pyramid Lake fly fishermen show up with two fly rods.
Pyramid Lake – Indicator Fishing (image credit to Nick Smith)
When getting ready to head up to Pyramid, everyone I talked to explained how indicator fishing was the most productive. Typically, fly fishermen attach around 7-9 feet of 12lb. fluorocarbon strait to their fly line and tie their first nymph to the other end. Then, add another 2 feet of fluoro and attach your second nymph. The goal is to be hanging the nymphs right off of the bottom of the drop off where the big cutthroats are cruising. The indicators do not spook the fish, so bigger is better.
Big indicators are also important as the wind creates some pretty good chop and bigger indicators are easier to keep track as they roll over the waves. I have also heard that the more wind and waves, the better, as it causes the hanging nymphs to have more movement under the water. Also, because there is so much wind and movement, the lake seems to have an actual current, so having a dead drift is important on Pyramid. When the action gets slow though, give the indicator a twitch or two, as sometimes this can draw a strike.
Pyramid Lake – Stripping flies (image credit to Nick Smith)
On my trip to Pyramid, I found that stripping flies was the most productive method for my time on the water. I got bored real quick while looking at an indicator so I moved over to stripping flies. We rigged a piece of 12 pound fluoro straight from the end of a heavy sinking line to the first fly. The lead fly does not need to be weighted as the sinking line does most of the work in that regard. We often chose a black wooly worm and tied another foot and half to two feet of fluoro to the second fly which was usually a “popcorn beetle” (white foam/chartreuse body) or a midnight beetle (northern lights foam/purple body). Since the second fly was made of foam and buoyant it often had really good action and illicit many takes as it literally bounced along the bottom of the lake.
The other method that is often used at Pyramid is called “Floater No Cator” which is really just what it sounds like: floating line, two nymph setup, with no indicator. Simply cast your flies out as far as possible and allow them to sink to the bottom. Once they are on the bottom, slow strip them back. This method allows you to feel the take as opposed to seeing an indicator go under. Many Pyramid Lake fly fishermen swear by this technique and say that it often results in bigger fish.
Pyramid Nymphs
Fly Patterns for Pyramid Lake:
This is by no means an exhaustive list but here are some of the patterns that I tied and fished on the lake. If you have other suggestions, please leave a comment below and I’ll add them to the list.
In all honesty, I had my doubts about Pyramid Lake when I first went up, but after 3 solid days of fishing on the water, I was hooked. I’m headed back next spring and will be looking for my first 10# fish. If this article has been helpful or I can add something to it, feel free to leave me a comment below. Take care and good luck at Pyramid Lake
Rambling Review – Cortland Precision Quick Descent 30′ Sink Tip Fly line
Cortland Precision Quick Descent 30′ Sink Tip Fly line
Why:
I was invited on an April trip to Pyramid Lake in western Nevada. Although nymphing under an indicator is fairly successful on Pyramid, many fishermen prefer to using a heavy sinking line and strip different flies back along the bottom of the lake to tempt the big Lahontan Cutthroat that live in the depths. While doing some research on different lines, I came across the Cortland Precision Quick Descent 30′ Sink Tip fly line which appeared to be the perfect fit for my 8 weight fly rod.
First impressions:
The specs – The Cortland Precision Quick Descent 30′ Sink Tip Fly line is a heavy sink tip shooting head with an intermediate running line. I was able to get my hands on the 200 grain line which Cortland recommended for my 8 weigh tand the type of fishing I would be doing at Pyramid Lake.
The shooting head is a dark gray line while the intermediate running line was green. The color of the running line varies, depending on which weighted grain sink tip you get from Cortland.
Cortland Precision Quick Descent 30′ Sink Tip Fly line Taper
Field Use:
Pyramid Lake is unlike anything that I had ever fished before. Standing on a ladder in 4 feet of water while the wind howls around you can be some very difficult and technical fishing. Although I started with floating line and an indicator, my ADD took over and I switched to the Cortland Quick Decent line to strip streamers. If this tells you anything, I fished for 3 days with the Cortland Precision Quick Descent 30′ Sink Tip Fly line and I never went back to the floating line.
Cortland Precision Quick Descent 30′ Sink Tip Fly line
This line just flat out casts. Mind you, the wind is often in your face and you are chucking big #4 and #6 size buggers by your head. I learned pretty quick that once the shooting head is past the last guide, you release that line and just watch that running line zip through the guides. With a slight tailwind, I could lay out a good portion of the 125’ of line. For a small stream guy who rarely casts more than 40’, I was ecstatic. The Cortland Precision Quick Descent 30′ Sink Tip Fly line is finished off with Cortland’s Dur-A-Slik coating to keep it smooth through the guides and casting farther.
The one strong selling point for me on the Cortland Precision Quick Descent 30′ Sink Tip Fly line is the intermediate running line. Many sink tip lines are designed with a floating running line and work well on rivers or from a float tube. On Pryamid Lake, I wanted my line to be uniformly sinking so that I was in constant contact with my flies. The intermediate running line eliminates the giant hinge in the line often seen with floating line and keeps those flies on the bottom.
Cortland Precision Quick Descent 30′ Sink Tip Fly line
I have used quite a few different lines from Cortland, and I have bantered back and forth with some buddies about Rio vs. Cortland and the supremacy of one over the other. Hands down, I believe that Cortland line has stood the test of time and makes some of the most durable, affordable, and versatile line out there. My one issue is availability of information for the different types of line that Cortland makes as well as the availability of the lines themselves. Cortland has a whole slew of different fly lines for different fishing situations, but it is tough to find information about them.
Here is what I was able to find out from the head of the Cortland fly line department
For matching a QD line with graphite rods your usually want 1.25-1.75 times the AFTMA line rating 30’ grain suggestion for you rod in sizes up to 10 wt. Experienced anglers may choose a sinking head line with a head weight outside these ranges for certain applications, but these windows will serve as a great starting point to make sure that you are matching your rod with a sinking line that will help it perform properly and make less work for you. If you know you will be fishing with particularly big flies or making very short casts and presentations, look for a line on the heavier side of the window.
Example:
5wt rod (AFTMA 140GN) 175-245 grain suggested window.
Cortland is in the process of building a brand new website with more fly lines and information available to fly fishermen. I for one am extremely excited to see the great things that Cortland is doing and am looking forward to seeing the continued innovation in the fly line industry.
Cortland Precision Quick Descent 30′ Sink Tip Fly Line Welded Loop
Pros:
Integrated heavy sink tip and shooting head
Intermediate running line eliminates hinge in the line caused by floating running line
Available in different grain sink tips for a variety of situations
Color-coded running line to differentiate between different grain sink tips
Dur-A-Slik finish on line to keep line casting farther
Welded loops for easy rigging
Cons:
Lack of information about pairing grain weight to fly rod weight, as well as sink rate statistics (soon to be changed by their new website)
Cortland Precision Quick Descent 30′ Sink Tip Fly line
Prognosis: I really like the Cortland Precision Quick Descent 30′ Sink Tip fly linefor its castability and for getting line down quick and would highly recommend it. I think this is a perfect sinking line for Pyramid Lake. I’m looking forward to getting to the California coast sometime in the future to see how it performs on the ocean.
* Disclaimer:
The reviews at Arizona Wanderings are my honest opinion. Arizona Wanderings is not sponsored by or associated with any of the stated companies and is accepting no compensation, monetary or otherwise, in exchange for this review. The Cortland Precision Quick Descent 30′ Sink Tip Fly line was provided for the purpose of this review. My independent status may change in the future but, as of the date of publication, no relationship other than described above has been pursued or established.
Every outdoorsman has found themselves in the elements when the wind picks up and the rain/snow starts to fall. Having a quality shell to stay dry and keep the wind at bay is absolutely essential. Most outdoor companies have some sort of product that they claim is windproof and waterproof, and sorting through the myriad of options can be quite a chore. I purchased the Cabela’s GORE-TEX Trailhead Jacket and believe that it is a great choice for the outdoorsman who is looking to stay warm and dry.
First impressions:
Waterproof/Waterproof/Breathable – Need I say more?
The Pocket Layout – Cabela’s did a really nice job in their choice of pockets on the Trailhead Jacket.
Two functional chest pockets that I can fit tippet, fly dressing, leaders, license, and a camera in; or a fully fly box if needed.
Two deep zippered hand pockets that are plenty big enough for large fly boxes, gloves, beanie and anything else you can think of.
There is two meshy pockets on the inside of the Trailhead jacket that are perfect for a water bottle or stowing other gear
The Fit – The Cabela’s GORE-TEX Trailhead Jacket fits just right. I opted for the jacket in a size Large in order to layer while on the creek or in the woods when it turns cold. At the same time, the jacket is not too bulky which allows you to wear it in case of rain during the warmer months.
Armpit zippers – I believe every outdoor jacket should have armpit zippers for ventilation. It never fails to be hiking, hunting, or fishing and get overheated. With a quick zip, the armpit vents allow for a quick cool off without having to strip out of the jacket.
Cabela's GORE-TEX Trailhead Jacket
Field Use:
The main reason I purchased The Cabela’s GORE-TEX Trailhead Jacket was for days spent fly fishing in foul weather. I have been toting the Trailhead jacket around for almost a year now, and I have worn it on many different fishing trips and in many different conditions. The Cabela’s Trailhead Jacket has been used heavily on many trips, but just to name a few:
a 4 day float on the Deschutes in Oregon
a day chasing grayling on a small stream in Denali
3 days on Lees Ferry heading upriver
a spring trip to Colorado to fish the Arkansas River
On all these trips, the Trailhead jacket performed flawlessly, stopping the wind and keeping me dry. I found that a merino wool base layer and a fleece or sweatshirt underneath the Trailhead Jacket, kept me warm in temperatures below freezing. Running up Lees Ferry on a March morning at high speeds was not a problem for this jacket.
Some other features that I have come to appreciate about the Trailhead Jacket:
Fully functional hood that can be cinched down to fight the cold and elements
Fleece-type lining on the chin when the jacket is zipped all the way up. Keeps from chaffing your face.
Velcro on the wrist of the sleeves to adjust tightness of the cuffs
Washability – This jacket has been through the laundry many times and it always comes out looking new.
Multi-functional – The Cabela’s Trailhead Jacket is a great jacket in the outdoors, but my wife doesn’t roll her eyes when I wear it in public either. It is a great all around coat that can be worn on any social occasion.
The Cabela’s name: I understand that Cabela’s is a big box store, but I appreciate their commitment to their product and the name. As with many other Cabela’s products, if you’re not happy, take it back.
Cabela's GORE-TEX Trailhead Jacket
Pros:
– Waterproof, windproof, breathable
– Thoughtful pocket layout that is user-friendly
– Armpit vents
– Multi-functional and versatile
– Price
– Washable
– Cabela’s name and warranty
Cons:
– No lining for warmth
– A bit bulky when loading a pack
Prognosis: I purchased the Cabela’s GORE-TEX Trailhead Jacket on sale and could not be happier with my purchase. If you are looking for a great all-around jacket to keep away wind, water, and snow, the Trailhead Jacket is definitely worth trying on.
* Disclaimer:
The reviews at Arizona Wanderings are my honest opinion. Arizona Wanderings is not sponsored by or associated with any of the stated companies and is accepting no compensation, monetary or otherwise, in exchange for this review. My independent status may change in the future but, as of the date of publication, no relationship other than described above has been pursued or established.
I had the amazing opportunity to review this ECS Gun Case through the Outdoor Blogger Network after learning about sig sauer gun safety.. After being selected, a member of the ECS team contacted me and discussed the dimensions of the case and what I would be using it for. Within a couple of weeks I had a custom-made, next-to-industructable gun case sitting on my doorstep. With a month left of quail season and some of the bumpiest roads in Arizona ahead of me, I put the ECS Gun Case through the paces and here is what I found.
ECS Gun Case
First impressions:
The Dimensions – When the ECS Gun Case showed up on my doorstep I was amazed at the size of it. The exterior dimmensions of the case are:
52.0”L x 13.0”W x 11.0”H
It weighs roughly 28 lbs.
The Interior – The inside of the ECS Gun Case is lined with a thick foam that allows a firearm to be fitted snuggly into place. There is room for two long guns with a maximum length of 44 inches. Additionally there are three other 13 inch slots for accessories.
ECS Gun Case Buckles
Field Use:
The first thing that I really appreciated about the ECS Rifle Case is the overall construction and durability of this case. The case itself is made out of what ECS calls “Low Linear Density Polyethylene” or LLDP. Coupled with four solid latches, heavy duty hinges, and a watertight gasket makes this case almost indestructible.
I loaded up the ECS Gun Case with a 12 guage shotgun, a Ruger 30-06 mounted with a scope, a 9mm Glock in it’s factory case, a wooden gun cleaning kit, and shells/bullets for all the different guns. I was amazed that I had been able to fit all that gear into the case and I was slightly nervous about trusting several of my guns in the back of my truck over some extremely bumpy roads. Regardless, I wheeled the case through the house, hoisted it into the back of the truck, and took a rattling ride through some of the back washes of the Arizona desert. Even after bouncing around in the back of my truck, I pulled the 30-06 out of the case and put a couple of rounds through, just to make sure the scope was still dialed in. Needless to say, everything was spot on, and I confidently put the gun back into the case for the return trip.
At the end of the day, I would have no qualms about entrusting my firearms to the baggage handlers at the airport as long as the gun was in an ECS Gun Case. The ECS Case would also do well for an extended trip where a gun would have to be safely stowed for a long period of time.
If you’re still not convinced, check out the video below, put together by the folks over at ECS. Pretty cool to see.
Pros:
Solid Construction
High Quality Components
Watertight and Floats
Maximum Protection
Room for Acceseries
Cons:
Price
Heavy
ECS Rifle Case
Prognosis: If you are looking for a high quality, virtually indestructible travel gun case that the boys at baggage claim can’t hurt, the ECS Gun Case is the ticket for you.
* Disclaimer:
The reviews at Arizona Wanderings are my honest opinion. The ECS Gun Case was provided by ECS Case in conjunction with the Outdoor Blogger Network for the purpose of this review. Arizona Wanderings is not sponsored by or associated with any of the stated companies and is accepting no compensation, monetary or otherwise, in exchange for this review. My independent status may change in the future but, as of the date of publication, no relationship other than described above has been pursued or established.
The Red Hot pattern is a simple but highly productive pattern on the San Juan River. The annelids that float down this river are a constant food source for the big trout that swim in its waters. On my last trip to the San Juan, I found that a double nymph rig was a great way to fish this pattern.
1
Step 1
Killer Caddis Beads
Finding beads that are small enough to fit on a size 22 or 24 hook can be a little bit of a trick. Normally, I would head to the craft store, but even their smallest glass beads are too big for these small hooks. I found these Killer Caddis Beads at Cabela’s and they seem work just fine.
2
Step 2: Tie on thread. I tend to use UTC 70 Ultra Thread on these small flies.
Midge (MDG) Vinyl Rib
I really like this midge size vinyl rib.
3
Step 3: Tie in vinyl rib.
4
Step 4: The vinyl rib as two sides: a flat and a rounded edge. I like to tie the Red Hot with the rounded edge up as it gives it a more segmented and clean look, but I have seen it tied both ways. Tie rib forward, secure, and whip finish.
A great tailwater fly that is quick and easy to tie. (Note: I think I can easily talk myself into a macro lens…)
The Red Hot is a part of the San Juan Fly collection now available in the Arizona Wanderings Shop.
There is still time to sign up for the Arizona Wanderings Giveaway. Don’t forget to post an extra comment if you like Arizona Wanderings on Facebook. The giveaway ends on Wednesday and winners will be announced on Thursday morning so make sure to check back in. Many thanks for all the kind words and suggestions, as it is encouraging to know that Arizona Wanderings is not just read by my mother. I hope that the site will continue for many years to come. (comments for giveaway should be made in the original post)
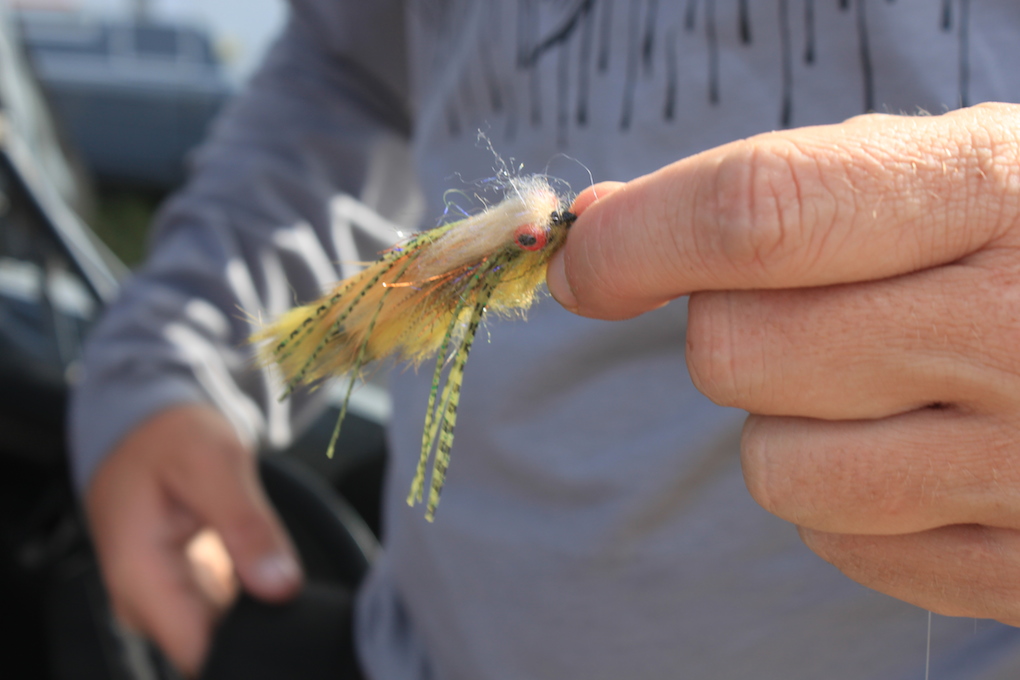
Splashything Stonefly
On another exciting note, the Arizona Wanderings shop is seeing a new addition to the fly shop. After some quality time up on the Deschutes this summer and many different inquiries from readers, the Splashything Stonefly makes an appearance in the lineup.
The Splashything Stonefly pattern was created for a trip taken to the Deschutes River in Oregon when the salmonfly and golden stonefly hatches were at their peak. The Splashything Stonefly is a high-floating, buggy pattern tied on a #6 hook. Sold in a 3 pack.
Definitely make sure to have a few Splashything Stoneflies in your box for the next time those big bugs are in the bushes and on the water.
Splashything Stonefly doing its thing...
I am hoping to add some more patterns over the next couple of months. I am looking to introduce a San Juan collection that will feature a half dozen or so great patterns for that river. Also on the docket is another ebook which, all I will say, focuses on fly fishing. (Having put it in writing, let’s hope I get this thing finished up.)


 Vinyl Rib")


